![]() Charges
And Repairs Area
Charges
And Repairs Area
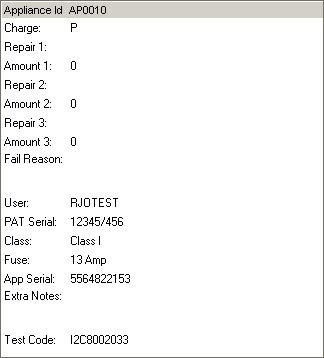
The Charges and Repairs information are in the middle of the Right Hand side of the main data screen. This area allows you to reveiw and ammend the charges and repairs that you have set on each appliance. Select the appliance by clicking on the one you want in the Appliances List on the left hand side of the data screen. You will see that the Charges And Repairs Area title will show the Appliance Id of the Appliance that you have selected.
Note! You cannot create an automatic invoice unless you have a charge (and if you have done some repairs, repair codes) on each appliance. It is best to enter charge codes into the PAT tester whilst in the field (if your PAT Tester supports adding extra information). See Also Creating An Invoice
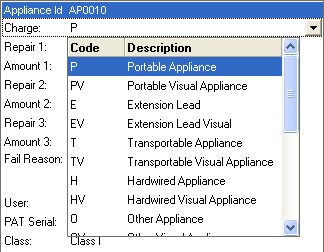
Charge
Type in a 1 letter Charge Code or use the drop down list to select one. Remember that if you have used the fields in the PAT Tester whilst you were testing in the field, there should be no need to edit or enter to many charge codes manually. Of course if you dont plan to invoice someone for the work that you have done then there is no need to enter any information in the charge and repair fields. See Also Charge And Repair Codes.
The Standard Charge Code and Descriptions can not be changed, however there are also nine User Definable Codes U1 to U9, See Maintain Your Test Prices for more information.
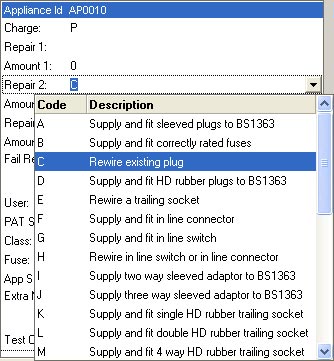
Repair And Amount Fields
Type in a 1 letter Repair Code or use the drop down list to select one. As above in the case of charge codes that you only need to do this to amend values that you entered in the field or enter ones that you forgot to enter.
In the Amount field enter any amount relevant for the repair. For eample if you supply cable, you can enter in the amount field the number of metres of cable that you supplied. In the example above where a fuse has been replaced, you can enter the fuse rating of the fuse. Note that you can add up to 3 repairs each Repair and Amount working in the same way as described above.
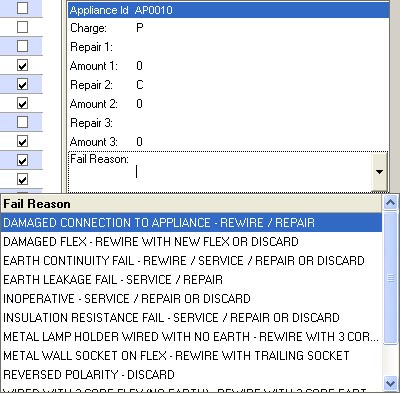
Fail Reason
If the Appliance failed one of the tests then you may want to enter a description of the reason why the apliance failed. You can type up to 80 charcters in the fail reason field. Of course, whilst testing in the field, you can enter the fail reason in the PAT Tester. See System Settings You can also use the drop down list to select a preset fail reason - this will speed up entering this information. You can maintain your own set of default fail reasons. See Also Maintain Default Fail Reasons.
If you have entered Fail Reasons in the fail reason field you can print these out when you print your results. See Also Print Setup
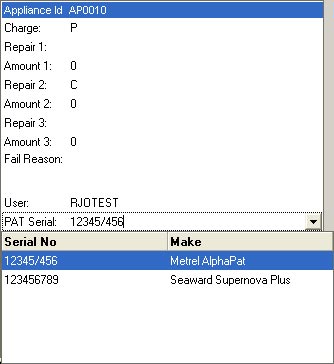
PAT Serial
In the PAT Serial number field there should be the PAT Serial Number of the PAT Tester that downloaded the data. You can also type in a new or ammended number in this field. You can also select a PAT Serial Number from your list of PAT Test Machines if you have previously entered them in the Maintain PAT Testers Screen
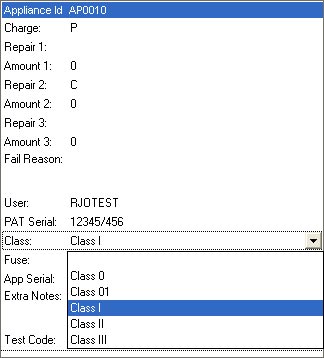
Class
The Class reflects the insulation protection method used within the appliance, this is automatically calculated when the results are downloaded from the PAT Tester. The Class can however be manually entered or changed.
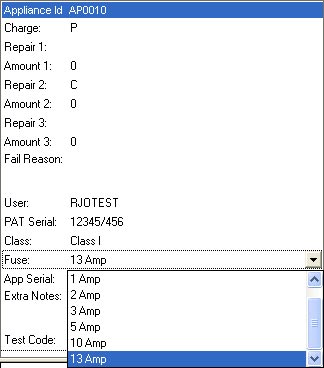
Fuse
A Fuse Rating can be entered for any appliance using the drop down menu. If your PAT Tester has a dedicated field to record this information at the time of test, such as the Megger PAT4, SimplyPats will automatically download the Fuse Rating for you.
App Serial (Appliance Serial Number)
You can enter the Actual Appliance Serial Number into this field, this may be the manufacturers own Serial Number supplied with the Appliance for example.
Notes
New to SimplyPats Version 5 is an additonal notes field. You can use this field to store any further documentary information about the appliance that you have tested.
(This Topic Last updated 01/09/2009)