![]() Uploading
Megger PAT410, PAT420, PAT450
Uploading
Megger PAT410, PAT420, PAT450
Connecting the PAT to your PC
You DO NOT connect your Megger PAT410, Megger PAT410, Megger PAT410 with a cable, rather you upload and download to a USB memory stick.
Backup the PAT
SimplyPats uploads to the Megger 400 database. Before you can proceed you must save a copy of the database to your memory stick.
WARNING: The upload process will overwrite the data in the database so please make two copies of the backup to allow you to restore the original information should you have the need too.
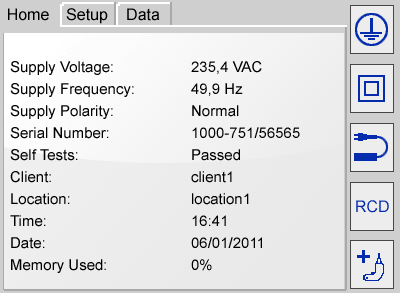
Press the HOME button on your Megger 400 Series PAT Tester and the following screen is displayed.
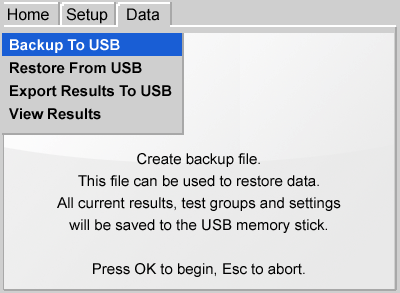
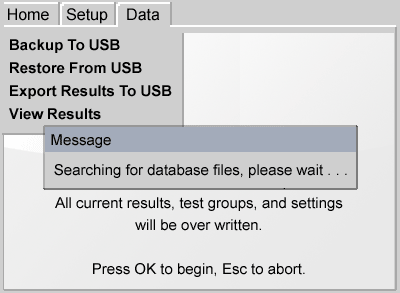
Make sure you have inserted a correctly formatted (FAT or FAT32) USB Memory Stick into the USB socket on your PAT Tester. Use the Right Arrow key on the Megger tester to show the Data TAB as shown below.
Use the Arrow keys on the Megger to Select Backup To USB and then click the OK button on the PAT tester.
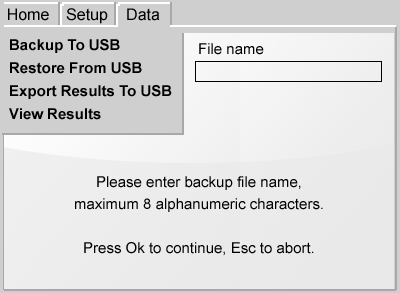
You will be prompted to enter a file name (NOTE! The filename can be a maximum of 8 characters and musn't include any spaces)
Once done, press the OK button on the Megger to save your data. You should receive a message saying that the data has been transferred successfully.
NOTE!
Before uploading data to your Megger PAT400, you must first make sure that you have downloaded data from the tester previously, since the last Megger 400 download raw data file contains the settings for your group codes (test codes) that are uploaded back into the tester.
Before you can upload, you must select the tests which you wish to upload.
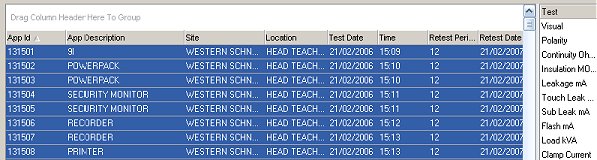
On the Main SimplyPats screen you can use the mouse together with the shift
and/or ctrl keys to select a range of tests.
Use the sorting and grouping options
if you want to select just a particular site or location.
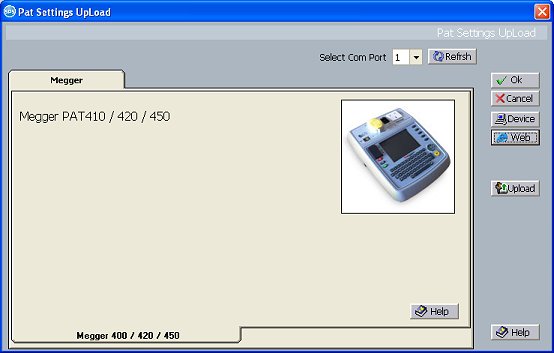
Select the "Upload PAT" option from the "File Menu" and you will see the PAT Settings Upload screen. Shown below.
Starting The Upload
To Start the upload process, click on the upload button ![]() and you should see a screen similar to that shown below as SimplyPats opens the Megger 400 Series upload utility.
and you should see a screen similar to that shown below as SimplyPats opens the Megger 400 Series upload utility.
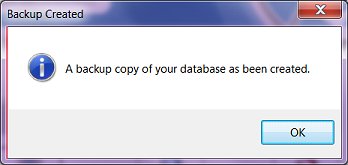
Click the upload ![]() button and an Open File dialogue box will appear. Navigate to the Megger 400 database that is to be used for the upload and click "Open".
button and an Open File dialogue box will appear. Navigate to the Megger 400 database that is to be used for the upload and click "Open".
A backup of your database will be created at this point and you will receive the following message:
The backup file will be saved to the same location as your Megger database and will have the same title preceded with the word BACKUP.
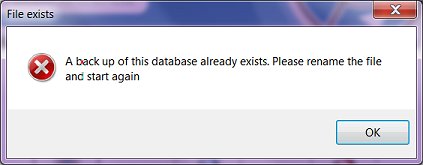
If the backup file already exists you will see the following message:
Please rename the backup file that already exists and try again.
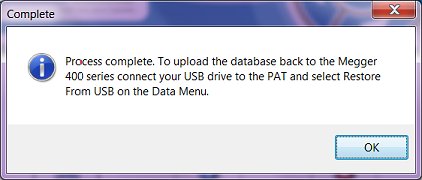
A message box will appear confirming that the data transfer has finished.
The next step is to upload the amended database to the Megger 400. Firstly please ensure that the amended database file is on your flash memory stick and return the memory stick to the PAT.
NOTE!
Please note that the backup file created has not been amended and contains your original settings.
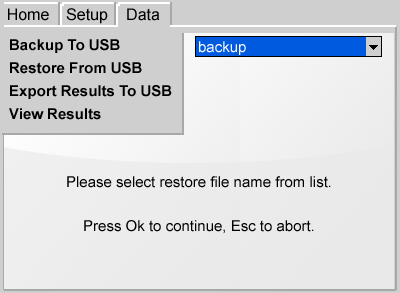
Use the Right Arrow key on the Megger tester to show the Data TAB and use the arrow keys to select Restore From USB.
Press "OK" to continue.
Press "OK" then select the correct file from the drop down list.
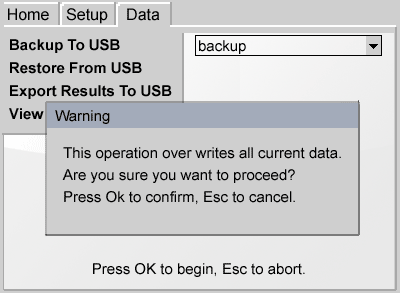
Press "OK" again and the following screen will appear
You will be asked to confirm that you want to overwrite the data currently store on the Megger tester. If you are happy to process click "OK".
Warning: Do not proceed if you did not make a secondary backup of the original database file as instructed above.
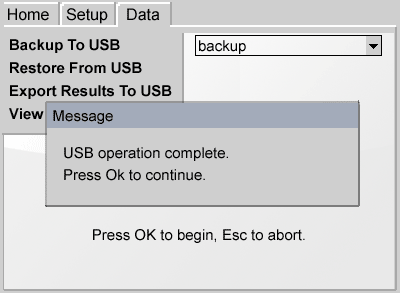
Once the upload is complete click "OK" on the PAT to finish.
List of Data that will be uploaded
Return To Upload PAT Settings Screen
(This Topic Last updated 25/06/2012)